Want to know how to get that Studio 54 glow that actually looks real?
Most disco makeup tutorials end up looking too costume-like or fall flat under regular lighting. The truth is, authentic 70s disco makeup has specific techniques that modern tutorials often skip.
Those metallic lids need the right base. That dewy skin requires layering in a particular order. Even the glossy lips have a formula.
Here’s the good news. When you know which shades work for your skin tone and how to layer cream products correctly, recreating this iconic look becomes straightforward.
The key is to use texture and light to your advantage, just as they did at the discotheque. Let me show you exactly how it’s done.
What Defined 70s Disco Makeup?
Disco makeup wasn’t subtle. It was made for the dance floor.
The era brought a beauty revolution focused on reflection and dimension. Eyes became the centerpiece with jewel tones like emerald and cobalt. Satin and metallic finishes replaced flat mattes entirely.
Face makeup emphasized a natural flush amplified for club visibility. Blush swept diagonally from apples to temples, creating lift that photographed beautifully.
Skin stayed radiant through strategic product choices. Cream formulas blended seamlessly and lasted through hours of dancing. Gel liners offered smooth application with the potential to smudge for softer edges.
Brows kept their natural fullness with defined arches. The thin brow trend wouldn’t arrive until the next decade.
Disco Makeup Look Inspirations

Once you master the basic technique, these four looks let you adapt disco makeup for any occasion. Each brings its own personality while staying true to the 70s aesthetic.
1. Silver Mirror-Wing + Micro Crystals
Apply foiled silver eyeshadow in a wing shape beyond your outer corner. Add 3 to 5 tiny crystals to the wing’s tail using cosmetic-grade adhesive. Keep lips nude so eyes stay the focus.
2. Emerald Smoke with Teal Spotlight
Create a deep green smoky eye in the outer V and press teal metallic shadow in the center for a flash of light. Tightline with black liner, then pair with rose or berry gloss for contrast.
3. Gilded Lid + Peach Gloss
Press molten gold cream shadow from lash line to brow bone over a tacky primer. Blend a soft bronze shade along the outer edge and finish with a peach-toned gloss on the lips.
4. Glitter Tears Under-Eye Triangle
Keep your top lid clean with just mascara and apply cosmetic-grade glitter in a small triangle under your eye. Use approved adhesive and pair with glossy nude lips to balance the look.
Pick the look that matches your mood and let your makeup tell its own story.
Disco Makeup Tutorial: 6 Easy Steps
Follow these steps to create authentic 70s disco makeup. Each step builds on the last for maximum impact.
Step 1: Skin & Sculpt
Apply a hydrating primer, then a sheer to medium luminous foundation. Blend with a damp sponge for natural coverage.
Apply cream bronzer to temples, the tops of the cheekbones, and the jawline, blending upward with your ring finger for warmth without harsh lines.
Step 2: Emerald Shape
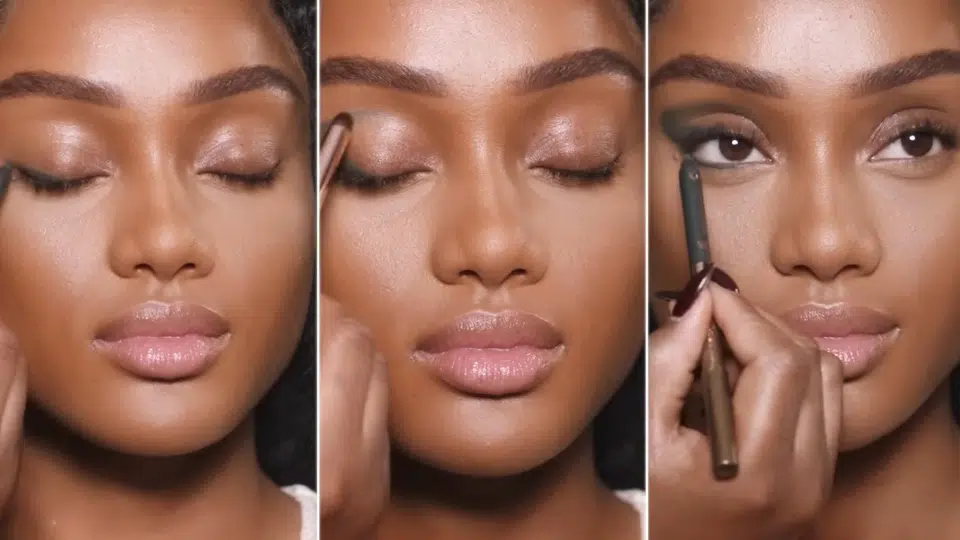
Draw a soft V shape at your outer corner with green eyeliner, starting at the lash line and angling toward your brow tail.
Smudge edges with a brush or fingertip for soft, smoky definition. For hooded eyes, place the V slightly higher so it shows when eyes are open.
Step 3: Spotlight + Gold Lid
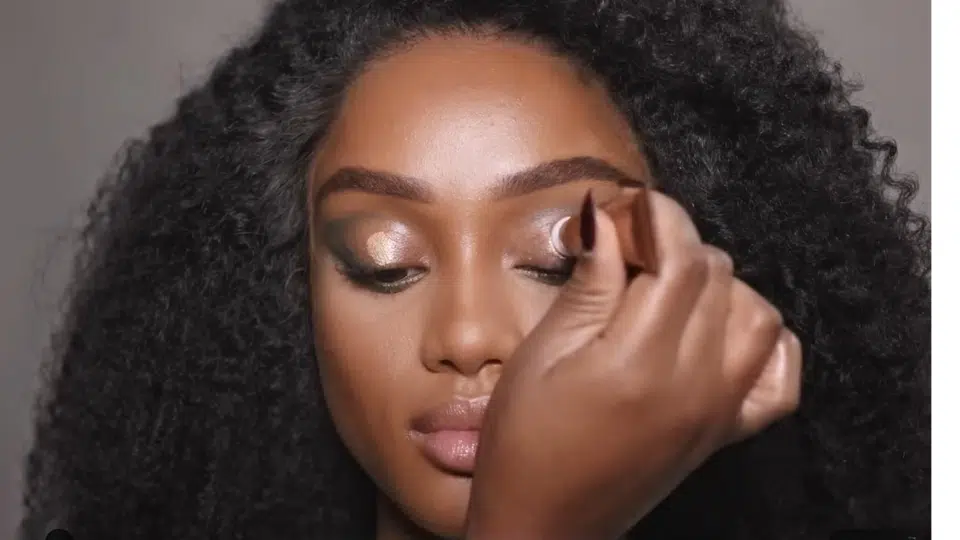
Tap liquid or cream highlighter onto the center of your eyelid without dragging. Before it dries, press iridescent gold eyeshadow on top with a flat brush or fingertip for maximum shine.
Leave the inner corner and outer V showing the green from Step 2 for dimension.
Step 4: Define & Lift
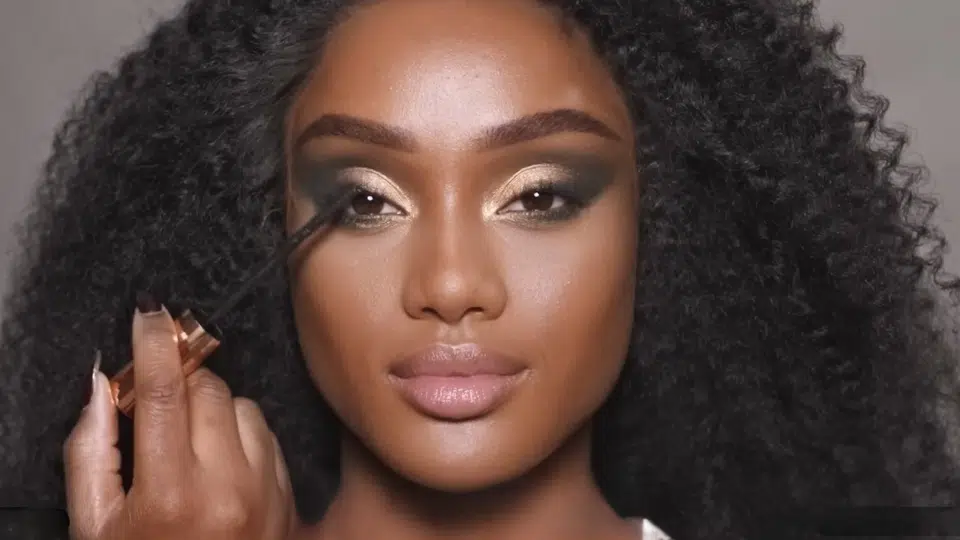
Tightline your upper lash line with black or brown liner to fill gaps between lashes. Curl lashes for 10 seconds, then apply volumizing mascara, focusing on outer lashes for lift.
Add half strip lashes to the outer corners only for extra drama without looking costume-like.
Step 5: Disco Cheekbones
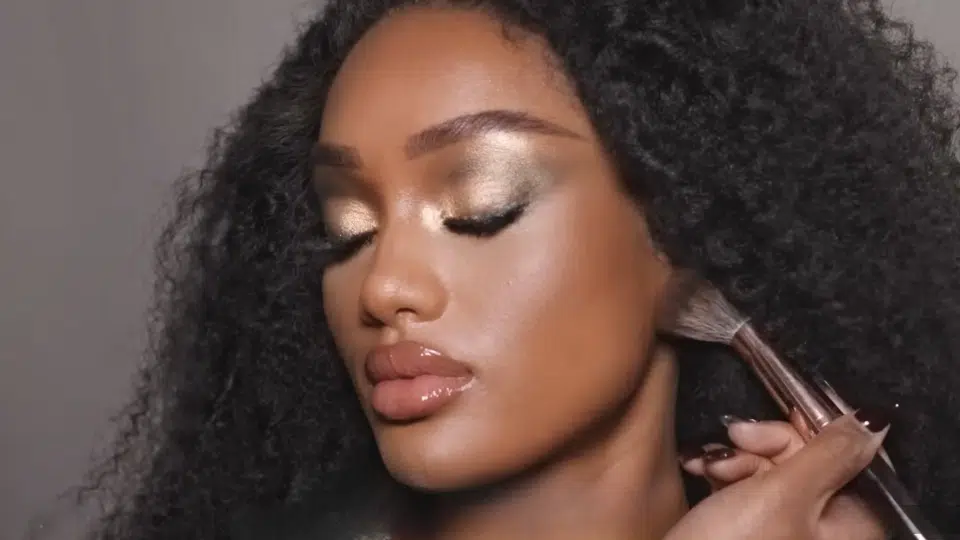
Apply liquid highlighter to cheekbone tops, nose bridge, and Cupid’s bow using your finger or a small brush. Start with one dot per area for a subtle glow or add a second dot for full disco intensity.
Blend upward and outward for a lifted appearance that catches every light source.
Step 6: Gloss & Set
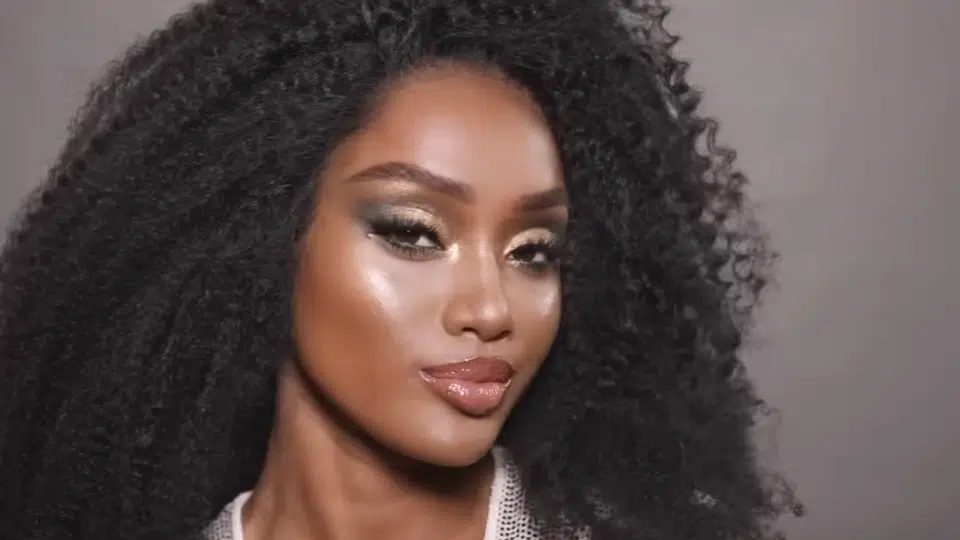
Apply clear or rosy-nude lip gloss generously for vinyl shine that defines the era. Finish by holding the setting mist 8 to 10 inches from your face and misting in an X pattern for even coverage.
This locks makeup in place while preserving the luminous finish you worked to create.
Video Tutorial
I’d like to give credit to Charlotte Tilbury Beautyfor their informative video, which served as a reference for this guide.
Best Disco Makeup Shades for Every Skin Tone
The right shades make disco makeup work for everyone. Here’s your personal color map.
| Skin Tone | Eyes | Cheeks | Lips |
|---|---|---|---|
| Fair to Light | Champagne, rose-gold, soft plum, pearl white | Peachy-pink blush with champagne highlighter | Cherry gloss or rosy-nude |
| Medium to Tan | Copper, burnished gold, emerald, bronze | Terracotta blush with gold highlighter | Caramel or mulberry gloss |
| Deep to Rich | Molten gold, cobalt blue, amethyst, deep copper | Berry or plum blush with intense gold highlighter | Chocolate-cherry or deep berry gloss |
Fair to Light: These shades catch light without looking harsh. Rose-gold especially flatters cool undertones.
Medium to Tan: Warm metallics look rich and dimensional. Emerald provides contrast that photographs beautifully.
Deep to Rich: Saturated metallics look gorgeously rich. Don’t shy away from bold jewel tones. They were made for you.
No matter your shade range, the secret to disco makeup is balance, pair shimmer with confidence, and let your color story shine as brightly as the dance floor.
Final Thoughts
Authentic disco makeup honors original 70s techniques while adapting for modern wear. The six-step tutorial provides your foundation.
Four inspirational looks show different interpretations. Your shade map ensures flattering colors for your skin tone.
What made this era special was the confidence to shine both literally and figuratively. Women wore reflective finishes proudly and understood how makeup transforms under the right lighting.
That principle still applies whether you’re heading to a themed party or trying something bold. Start with one element if the full look feels overwhelming.
Try just the metallic lid or glossy lip first. Build your comfort level gradually. Always remove everything properly at night to keep skin healthy.
Then grab your shimmer and create your own version of that iconic dance floor glow.